Skip to content
Opura
Try for free

Your photo. The way you saw it.

The sky felt wider. The light felt warmer. Bring back what made you take the photo, while keeping your original intact.

Real app captures in your language. Drag the slider to compare.

Start simple. Go deeper when you need to.

Keep what caught your eye.

Brighten a face or soften the sky. You decide what stands out in the photo. Your original stays untouched.

01 / 03 Simple mode

The light you remember.

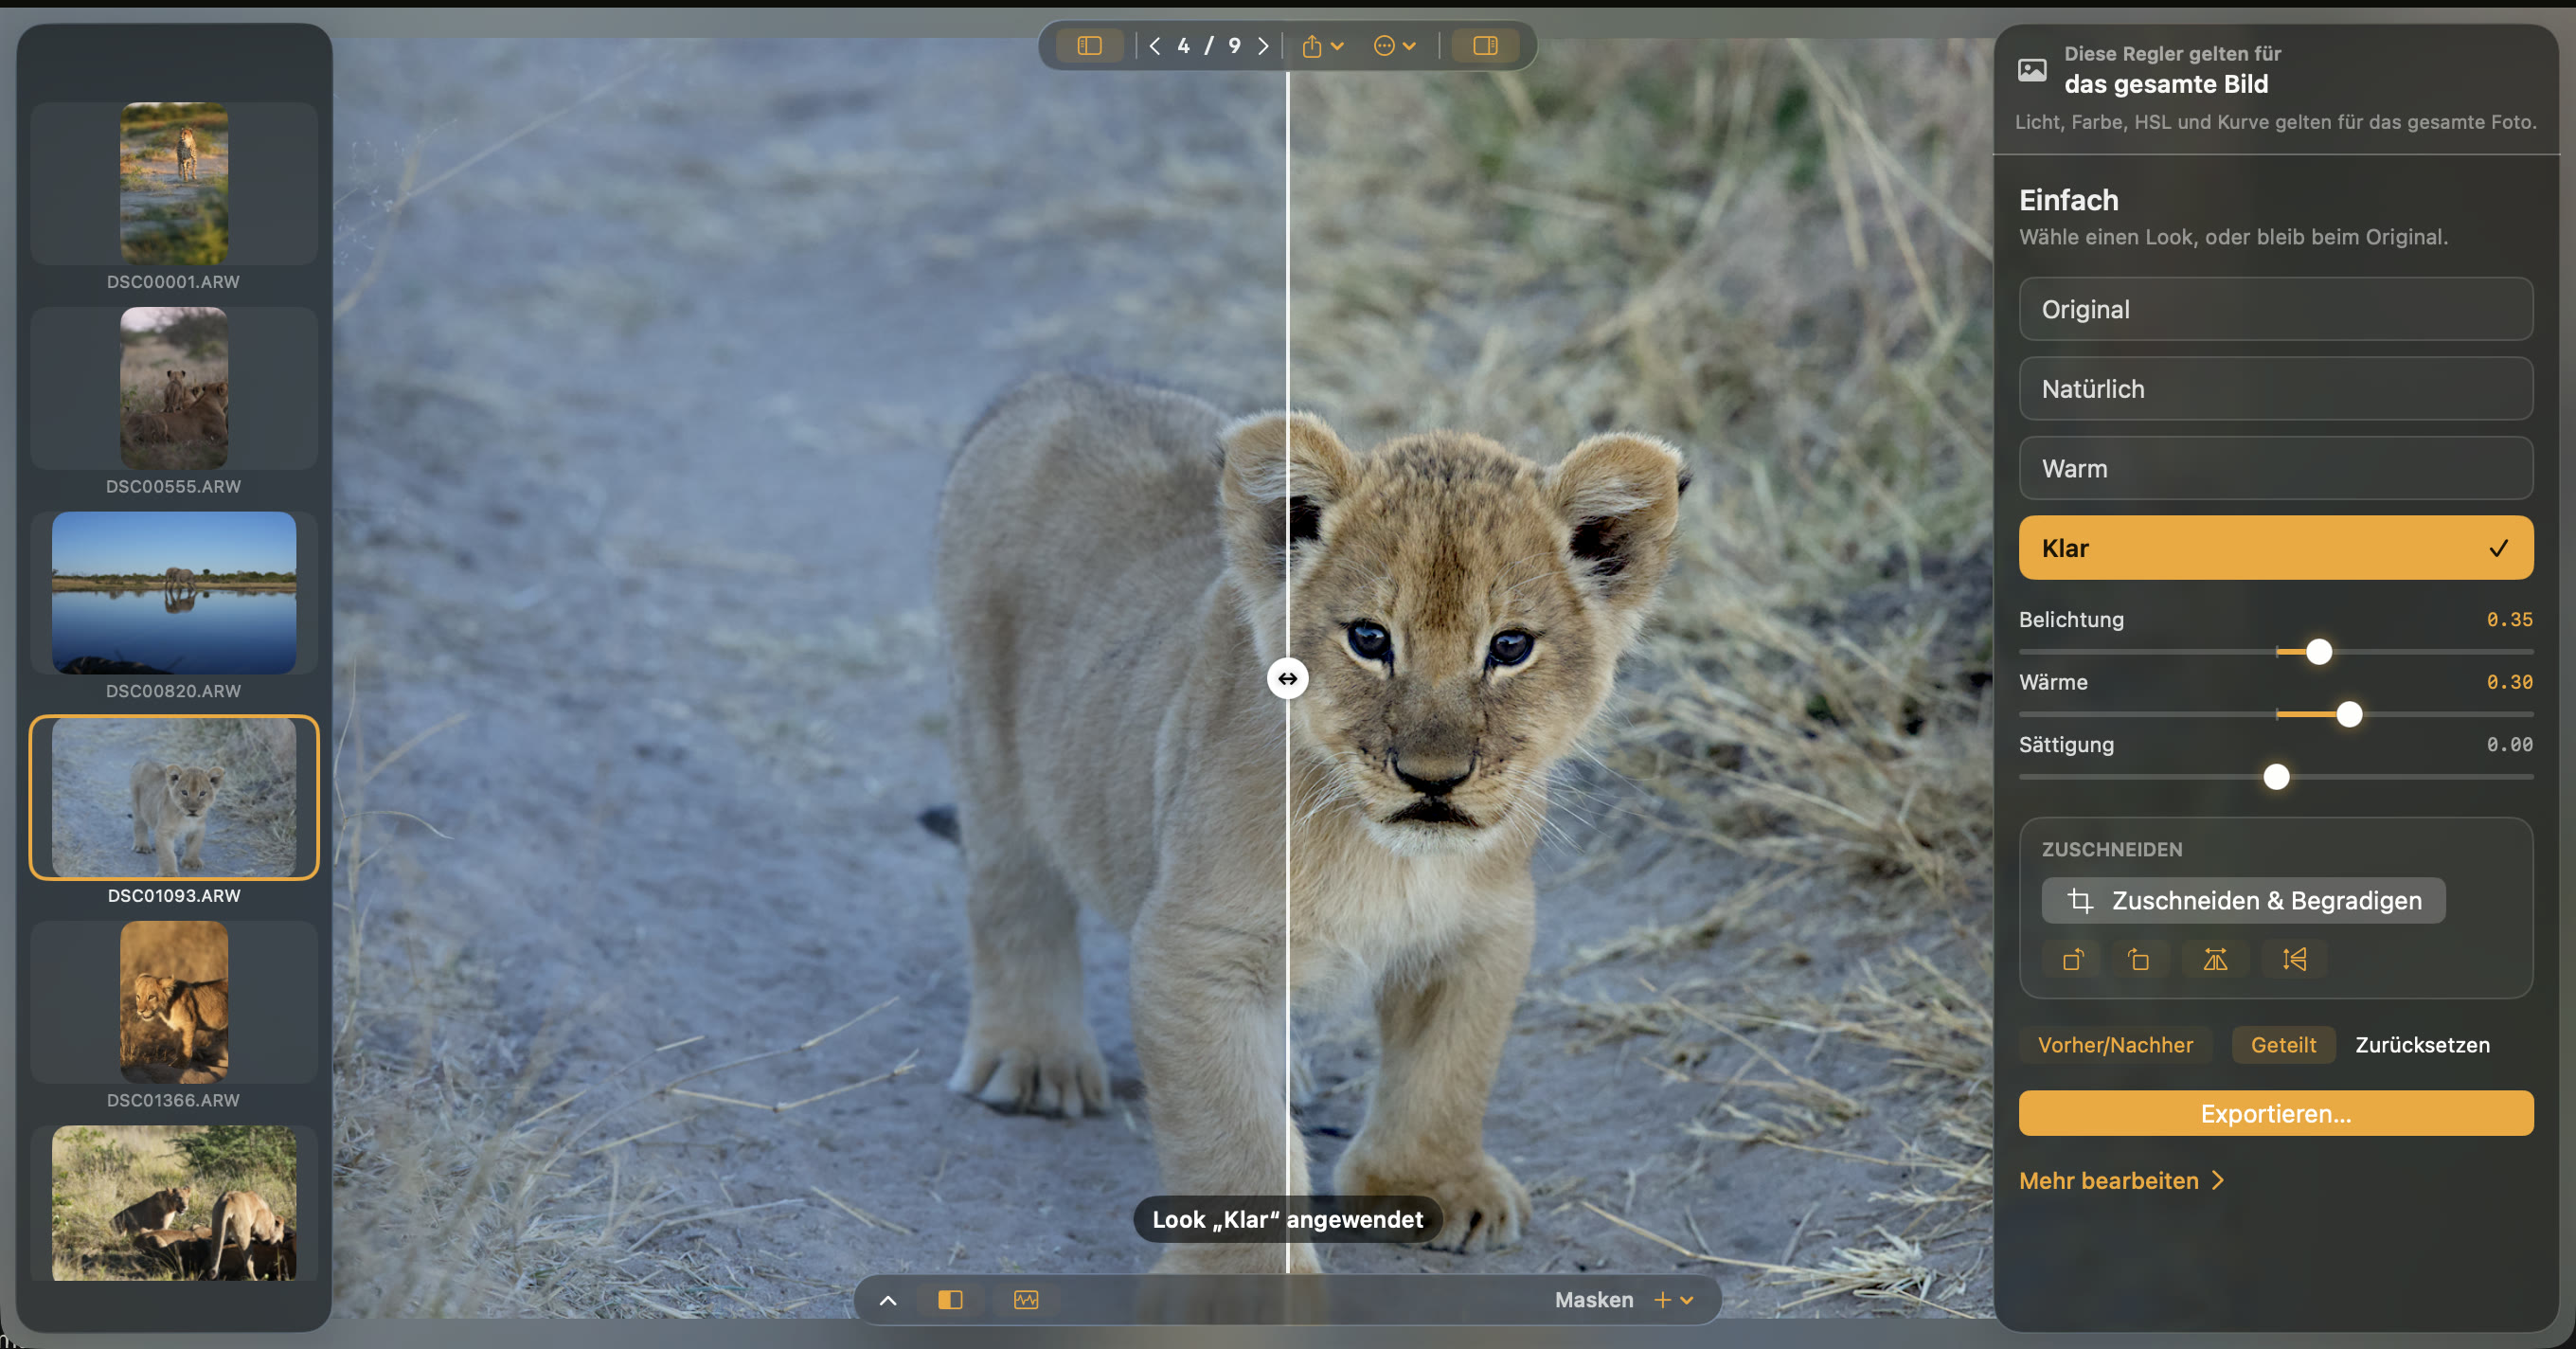
Start with a look and adjust exposure, warmth and saturation to suit the scene, from a cool morning to warm evening light.
Opura PhotoSimple mode
Opura Photo Simple mode showing the original and adjusted landscape side by side with three controls.
A clear way into editing.
02 / 03 Advanced mode

More light on what matters.

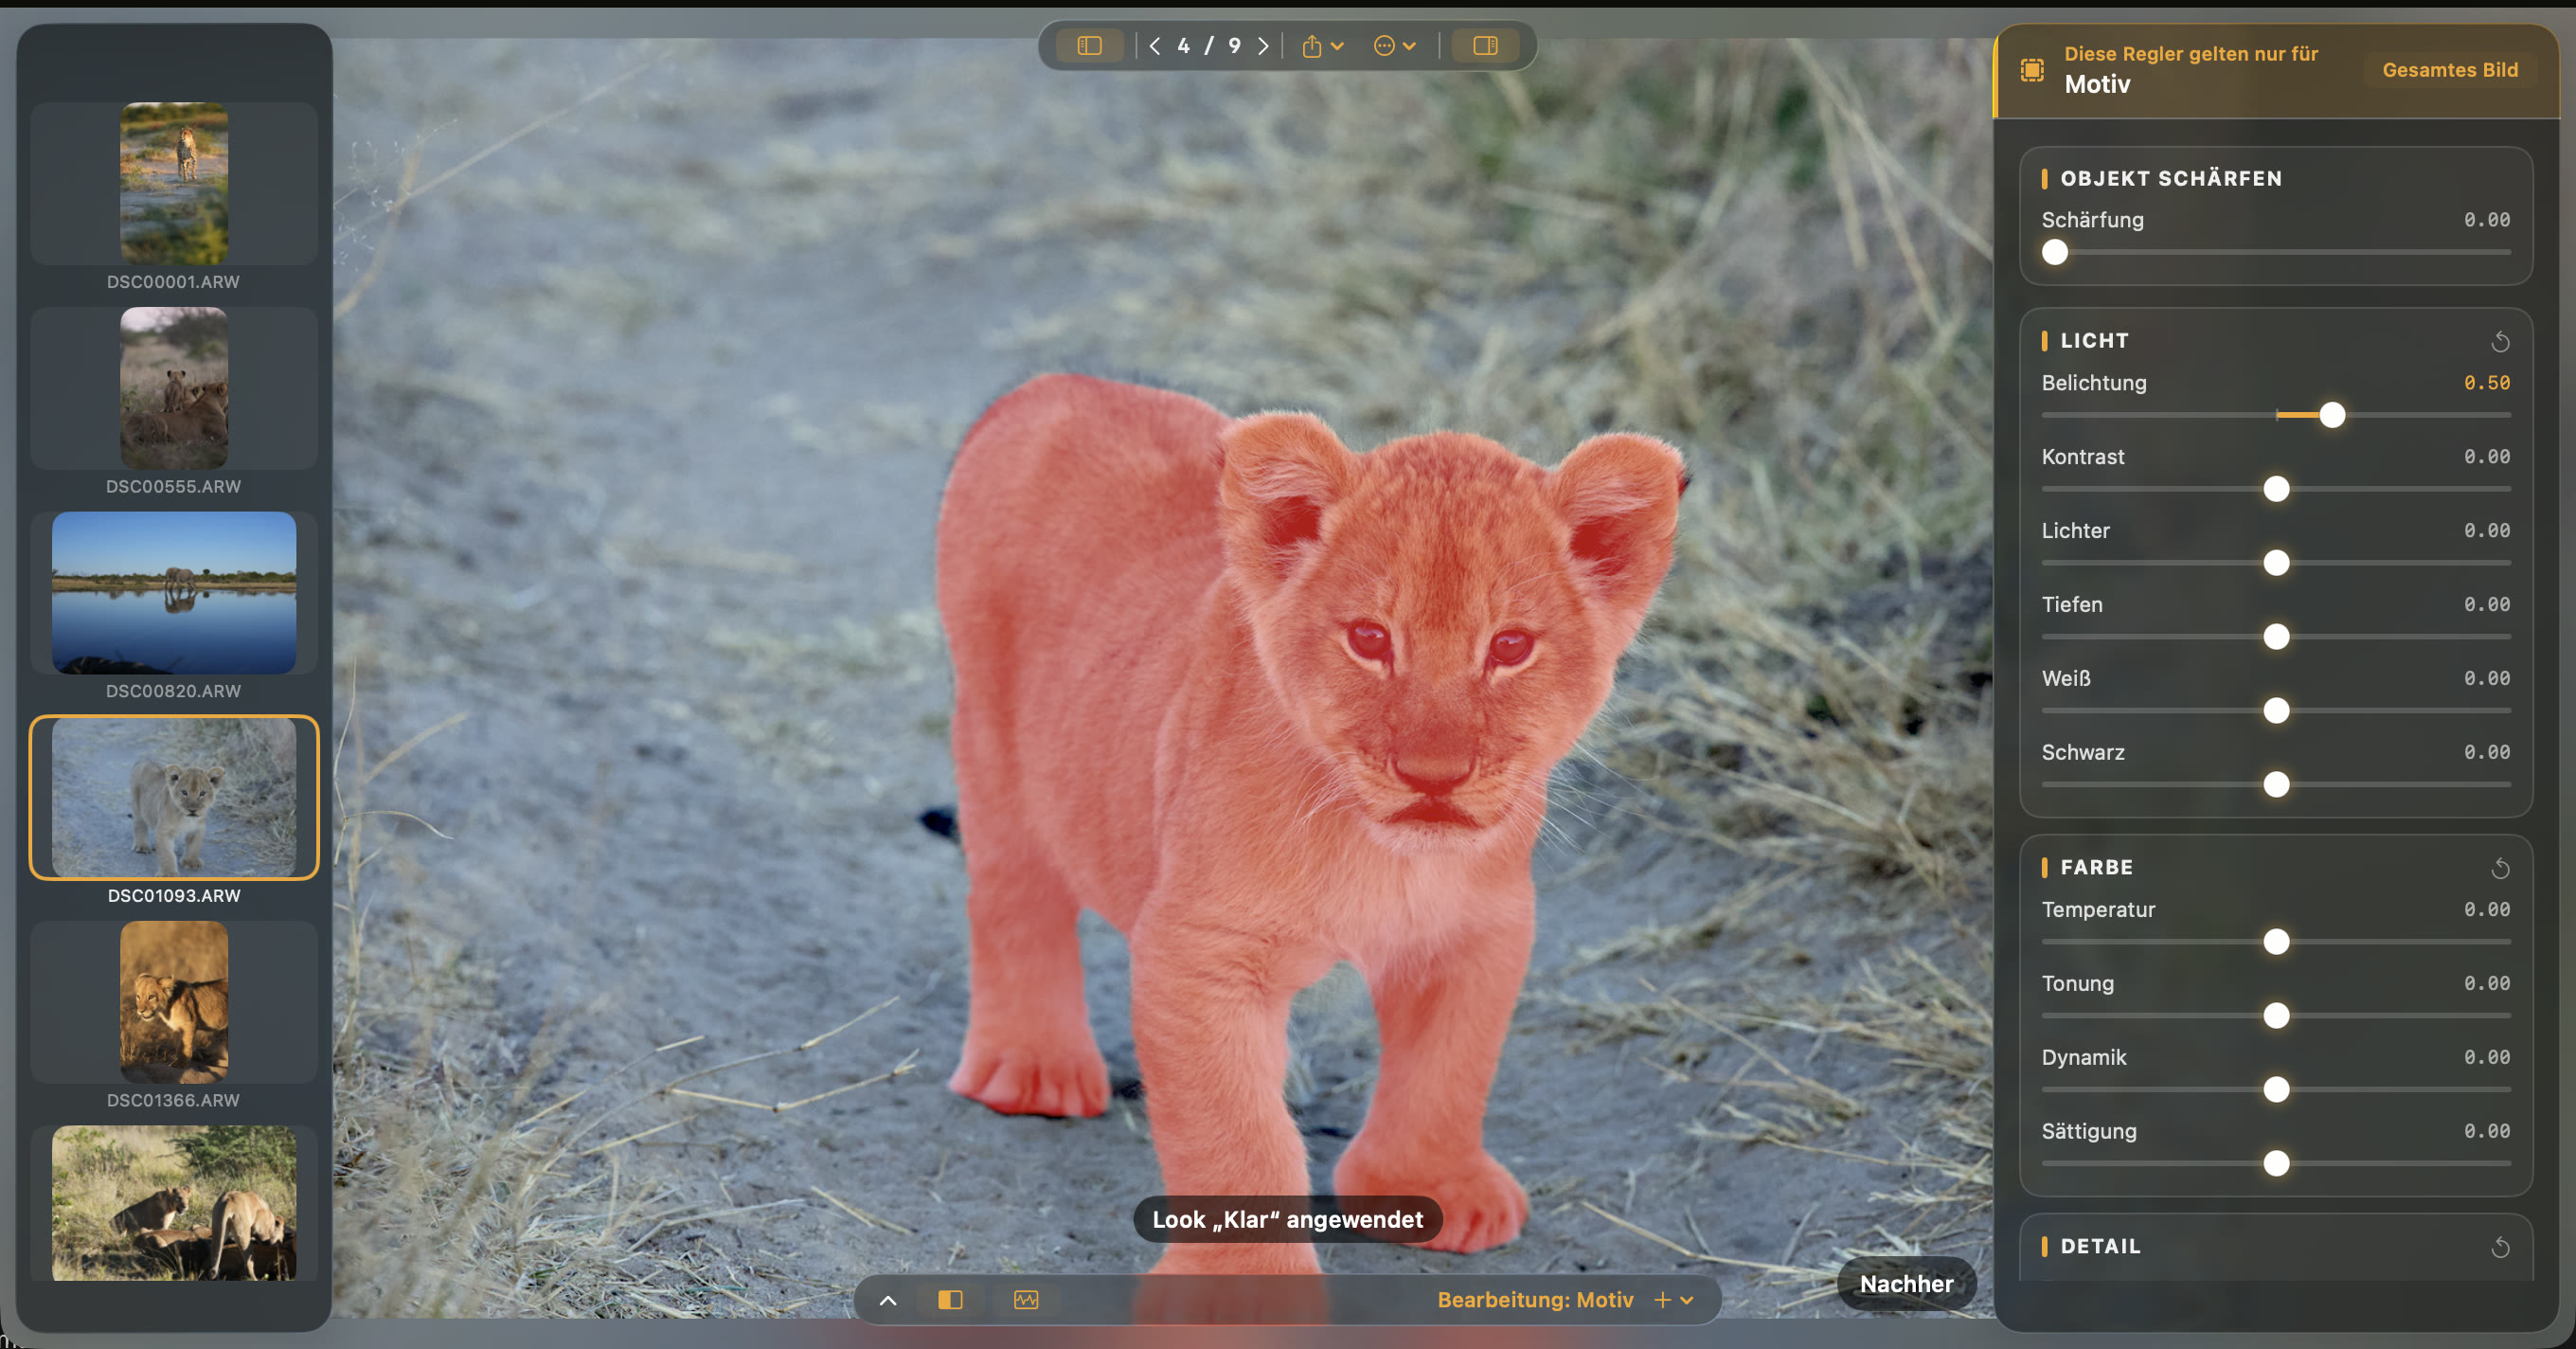
Bring out your subject without changing the whole photo. Masks keep your adjustments in the area you choose. Your look stays when you move into Advanced.
Opura PhotoSubject mask
Opura Photo showing a subject mask as a red overlay on a lion cub.
Local adjustments stay visible and controlled.
03 / 03

Try seeing it differently.

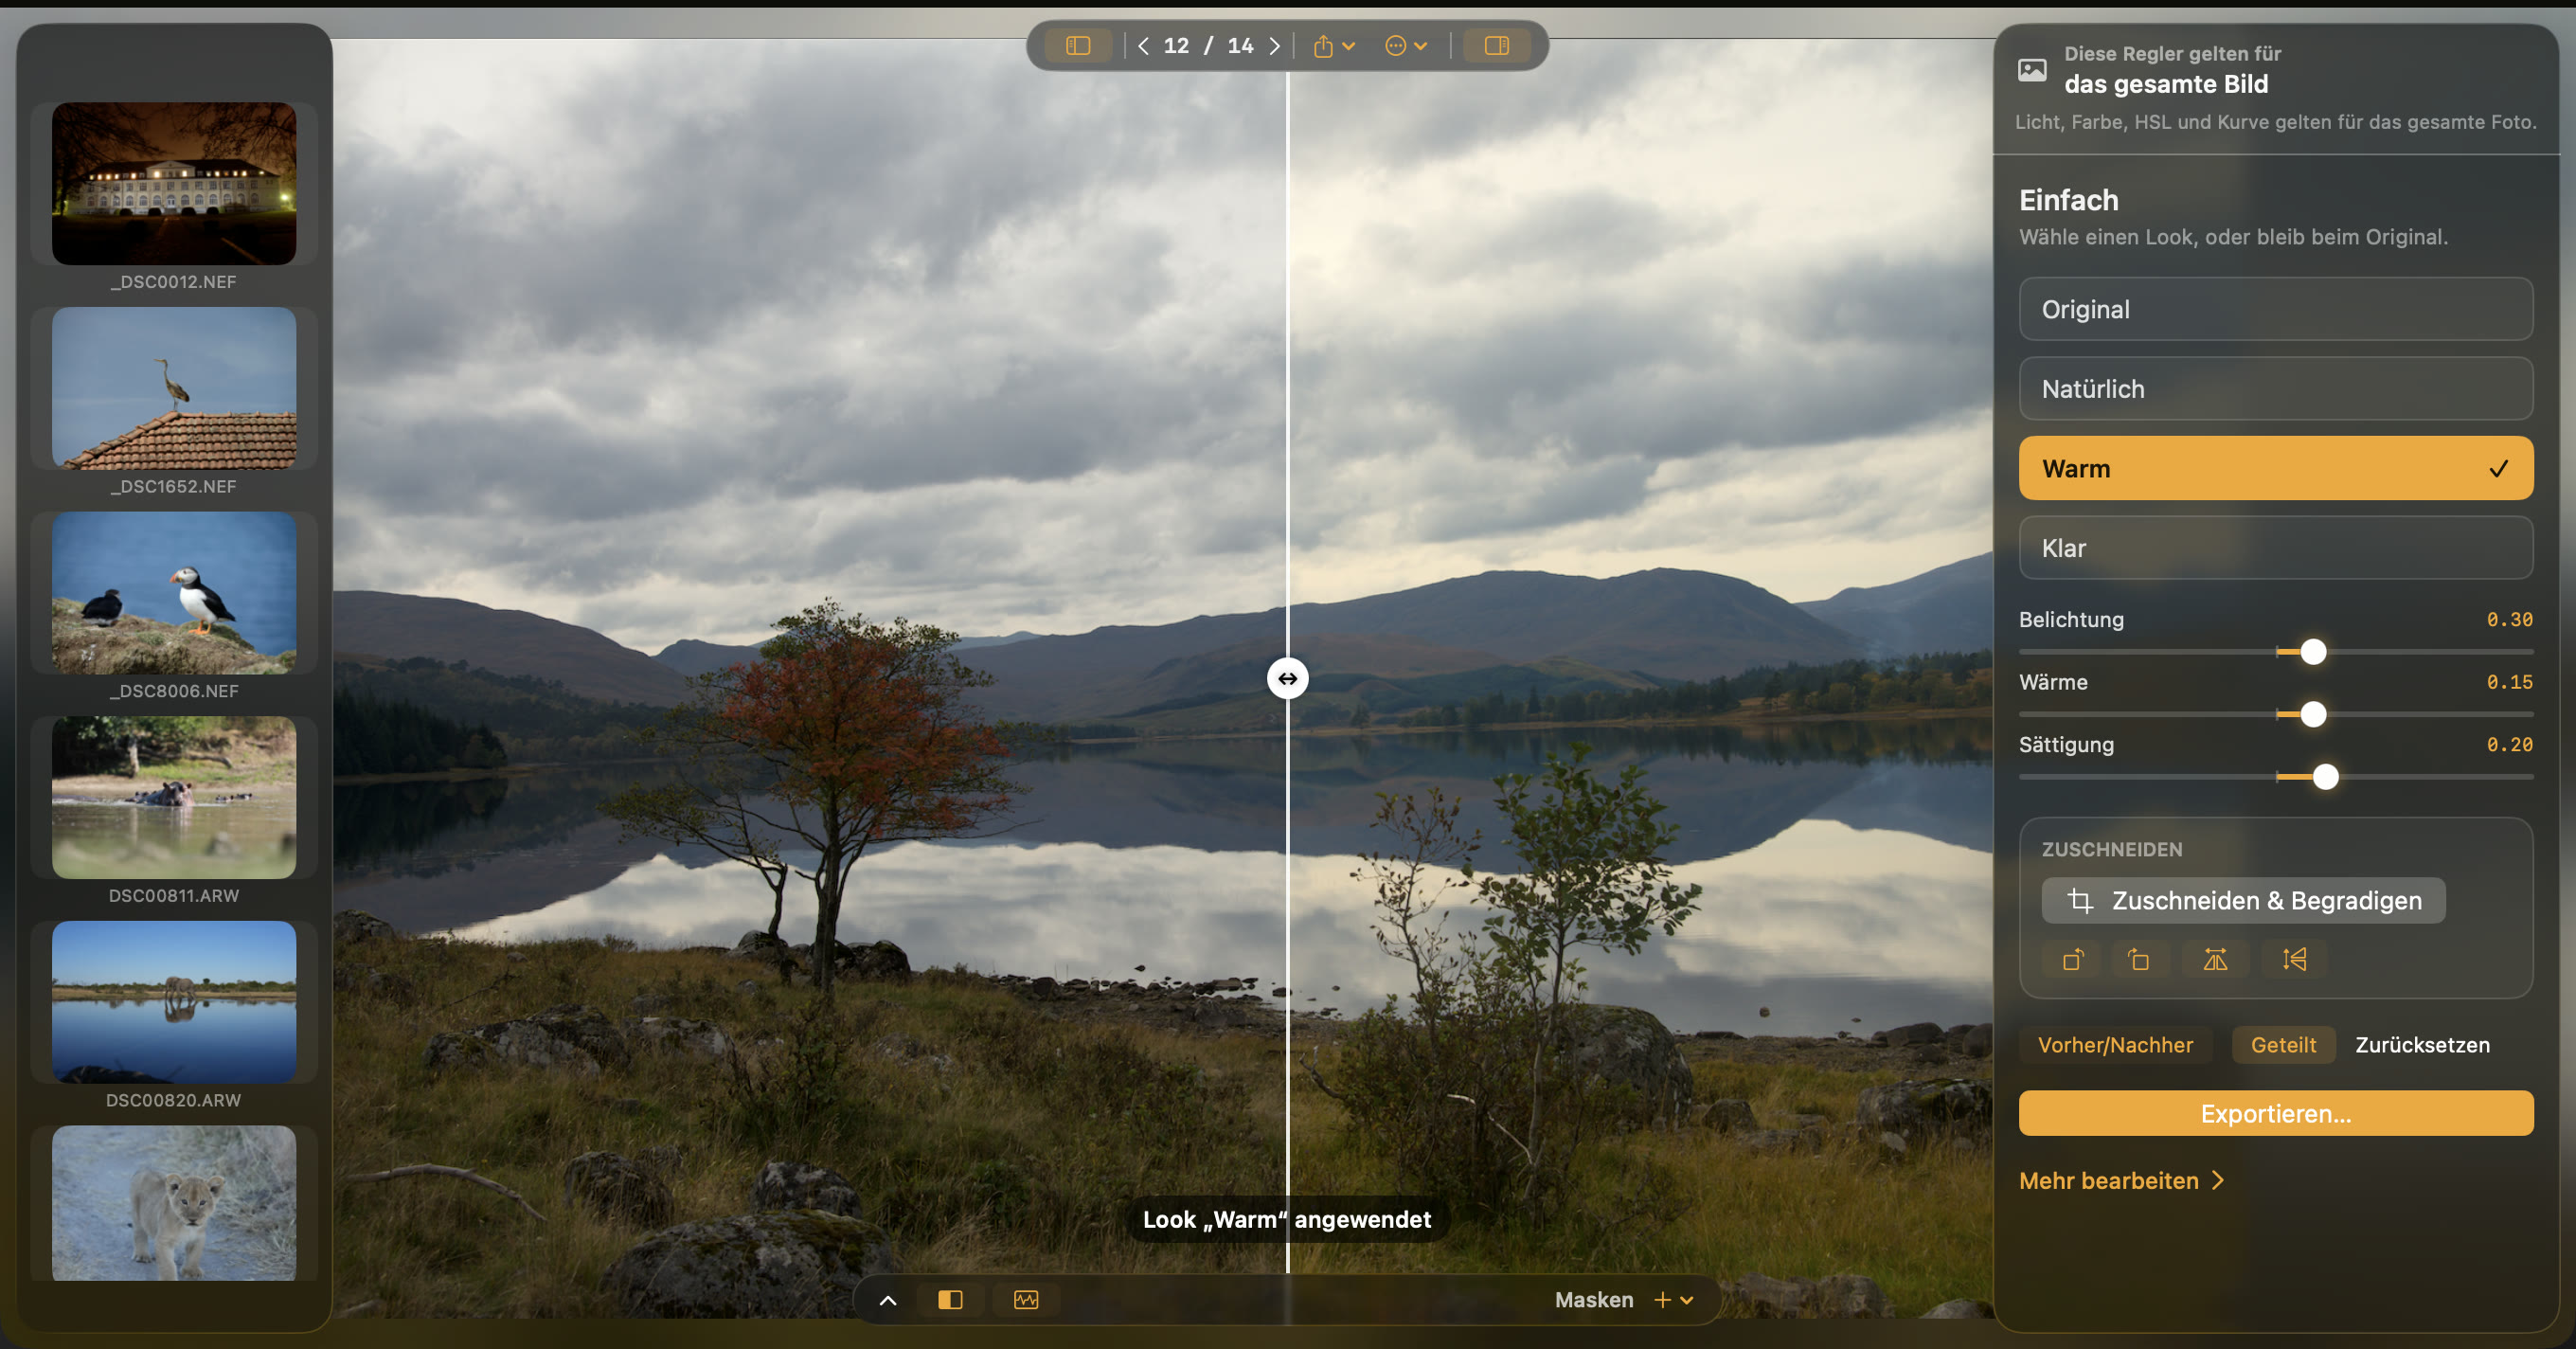
A warmer tone, a different crop. Compare your edit with the original and come back to it later.
Opura PhotoOriginal and edit
Opura Photo split view comparing the original Scottish loch photograph with the developed result.
Before and after in the same view.
Easy to get started

Try it with your own photos for 7 days.

Download Opura Photo and sign in or create an account in the app. The app will show you the next steps for activation.

Start free trial

No plan selection before download. No card. No automatic purchase after 7 days.

Simple mode

How warm was that evening?

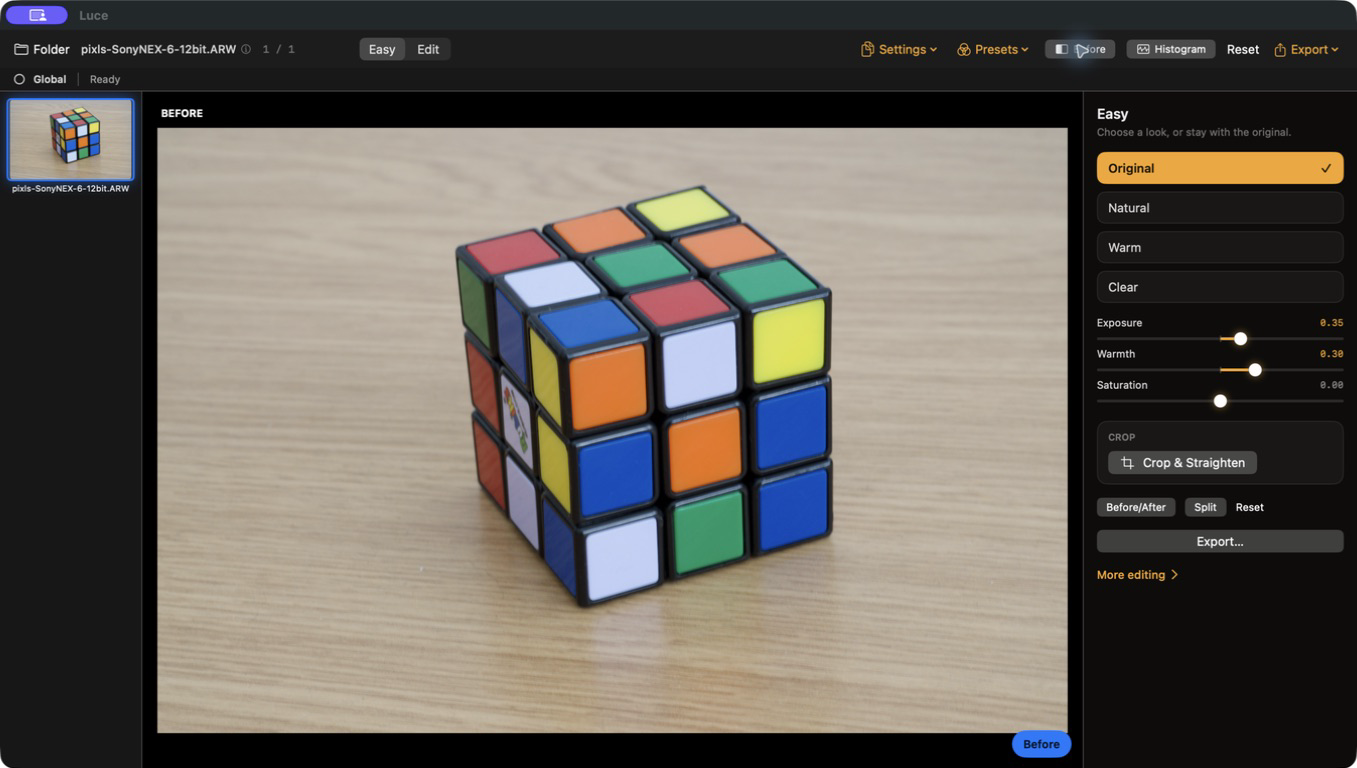
In Simple mode, a look and three controls let you adjust light and colour to the scene you remember.

  1. Simple · 1 / 4

    Photo open, simple mode

    A fjord in Norway. Looks on the right, then exposure, warmth and saturation.

  2. Simple · 2 / 4

    Look “Clear”

    One click on Clear. The photo gets its base tone; the controls stay at zero.

  3. Simple · 3 / 4

    Three controls

    Exposure +0.30, warmth −0.22, saturation +0.25 – adjusted one after another, every move visible at once.

  4. Simple · 4 / 4

    A photo that feels right

    That is all it takes to start. Advanced mode is one switch away.

Recording of the running app · frame sequence from the clip

Compare at any time Switch between before, after, and a split view.
More control when you need it Move into Advanced mode without losing the look you already made.
Try it in your browser

Get a feel for Simple mode.

This interactive preview uses browser filters. It demonstrates the controls, but it is an approximation rather than Opura Photo's RAW processing.

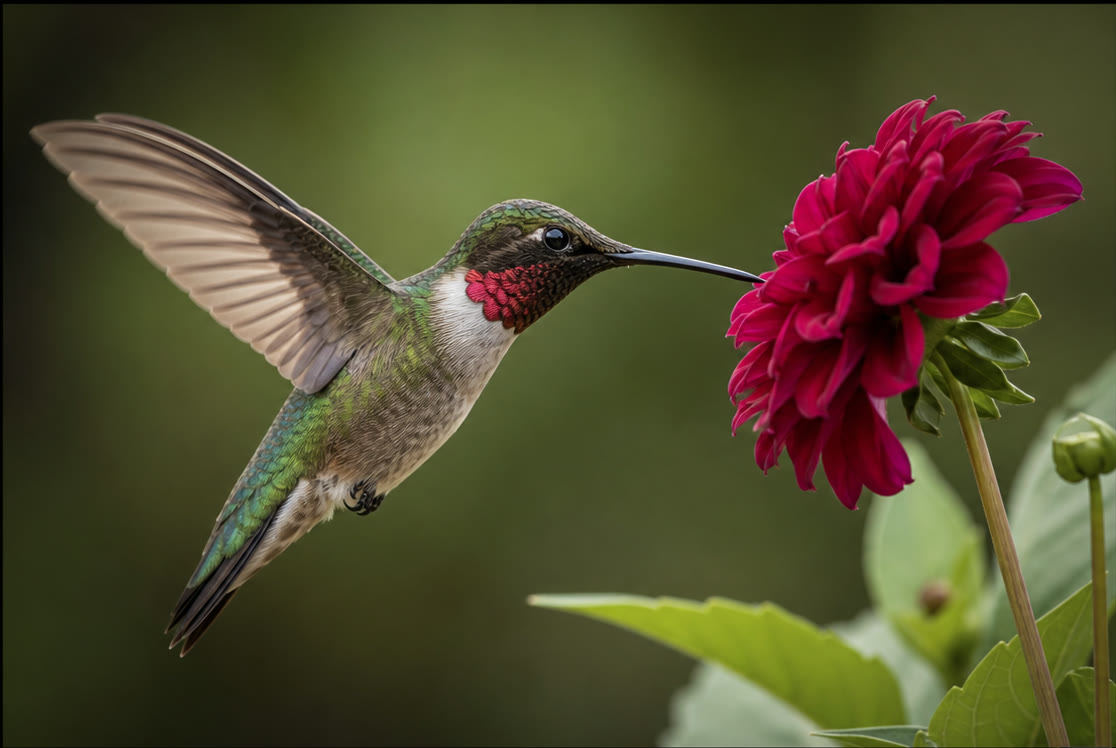
Hummingbird at a dahlia, from a real app capture Browser approximation · Photo from Opura Photo

Simple

In the app, every change is saved in a recipe beside the RAW. Your original stays untouched.

Advanced mode

The small details matter, too.

A colour feels too strong, a horizon is still tilted. In Advanced mode, find the tools for the parts that need a little more attention.

01

Different light. A different mood.

From soft morning light to bold colour, shape the look with exposure, white balance, HSL, curves and colour grading. Add your own .cube LUTs.

02

The details in the frame.

Bring out texture, reduce haze or soften noise. Refine the details with sharpening, lens corrections and defringe.

03

Find the right frame.

Frame your subject with a crop that works. Straighten the horizon and remove distracting spots. Your original stays intact.

04

Ready to share your photo.

Check the details at 1:1 and keep an eye on highlights and shadows. Export your photo as JPEG, HEIC or 16-bit TIFF in sRGB.

Local adjustments

Just the subject. Or everything around it.

Subject mask as a red overlay on a lion cub

Every view is a real capture from Opura Photo. Masks can be limited by luminance or color, then combined, intersected, subtracted, or inverted.

  1. Masks · 1 / 4

    Elephant at the waterhole

    Nothing is masked yet; the controls apply to the whole photo.

  2. Masks · 2 / 4

    Add a mask

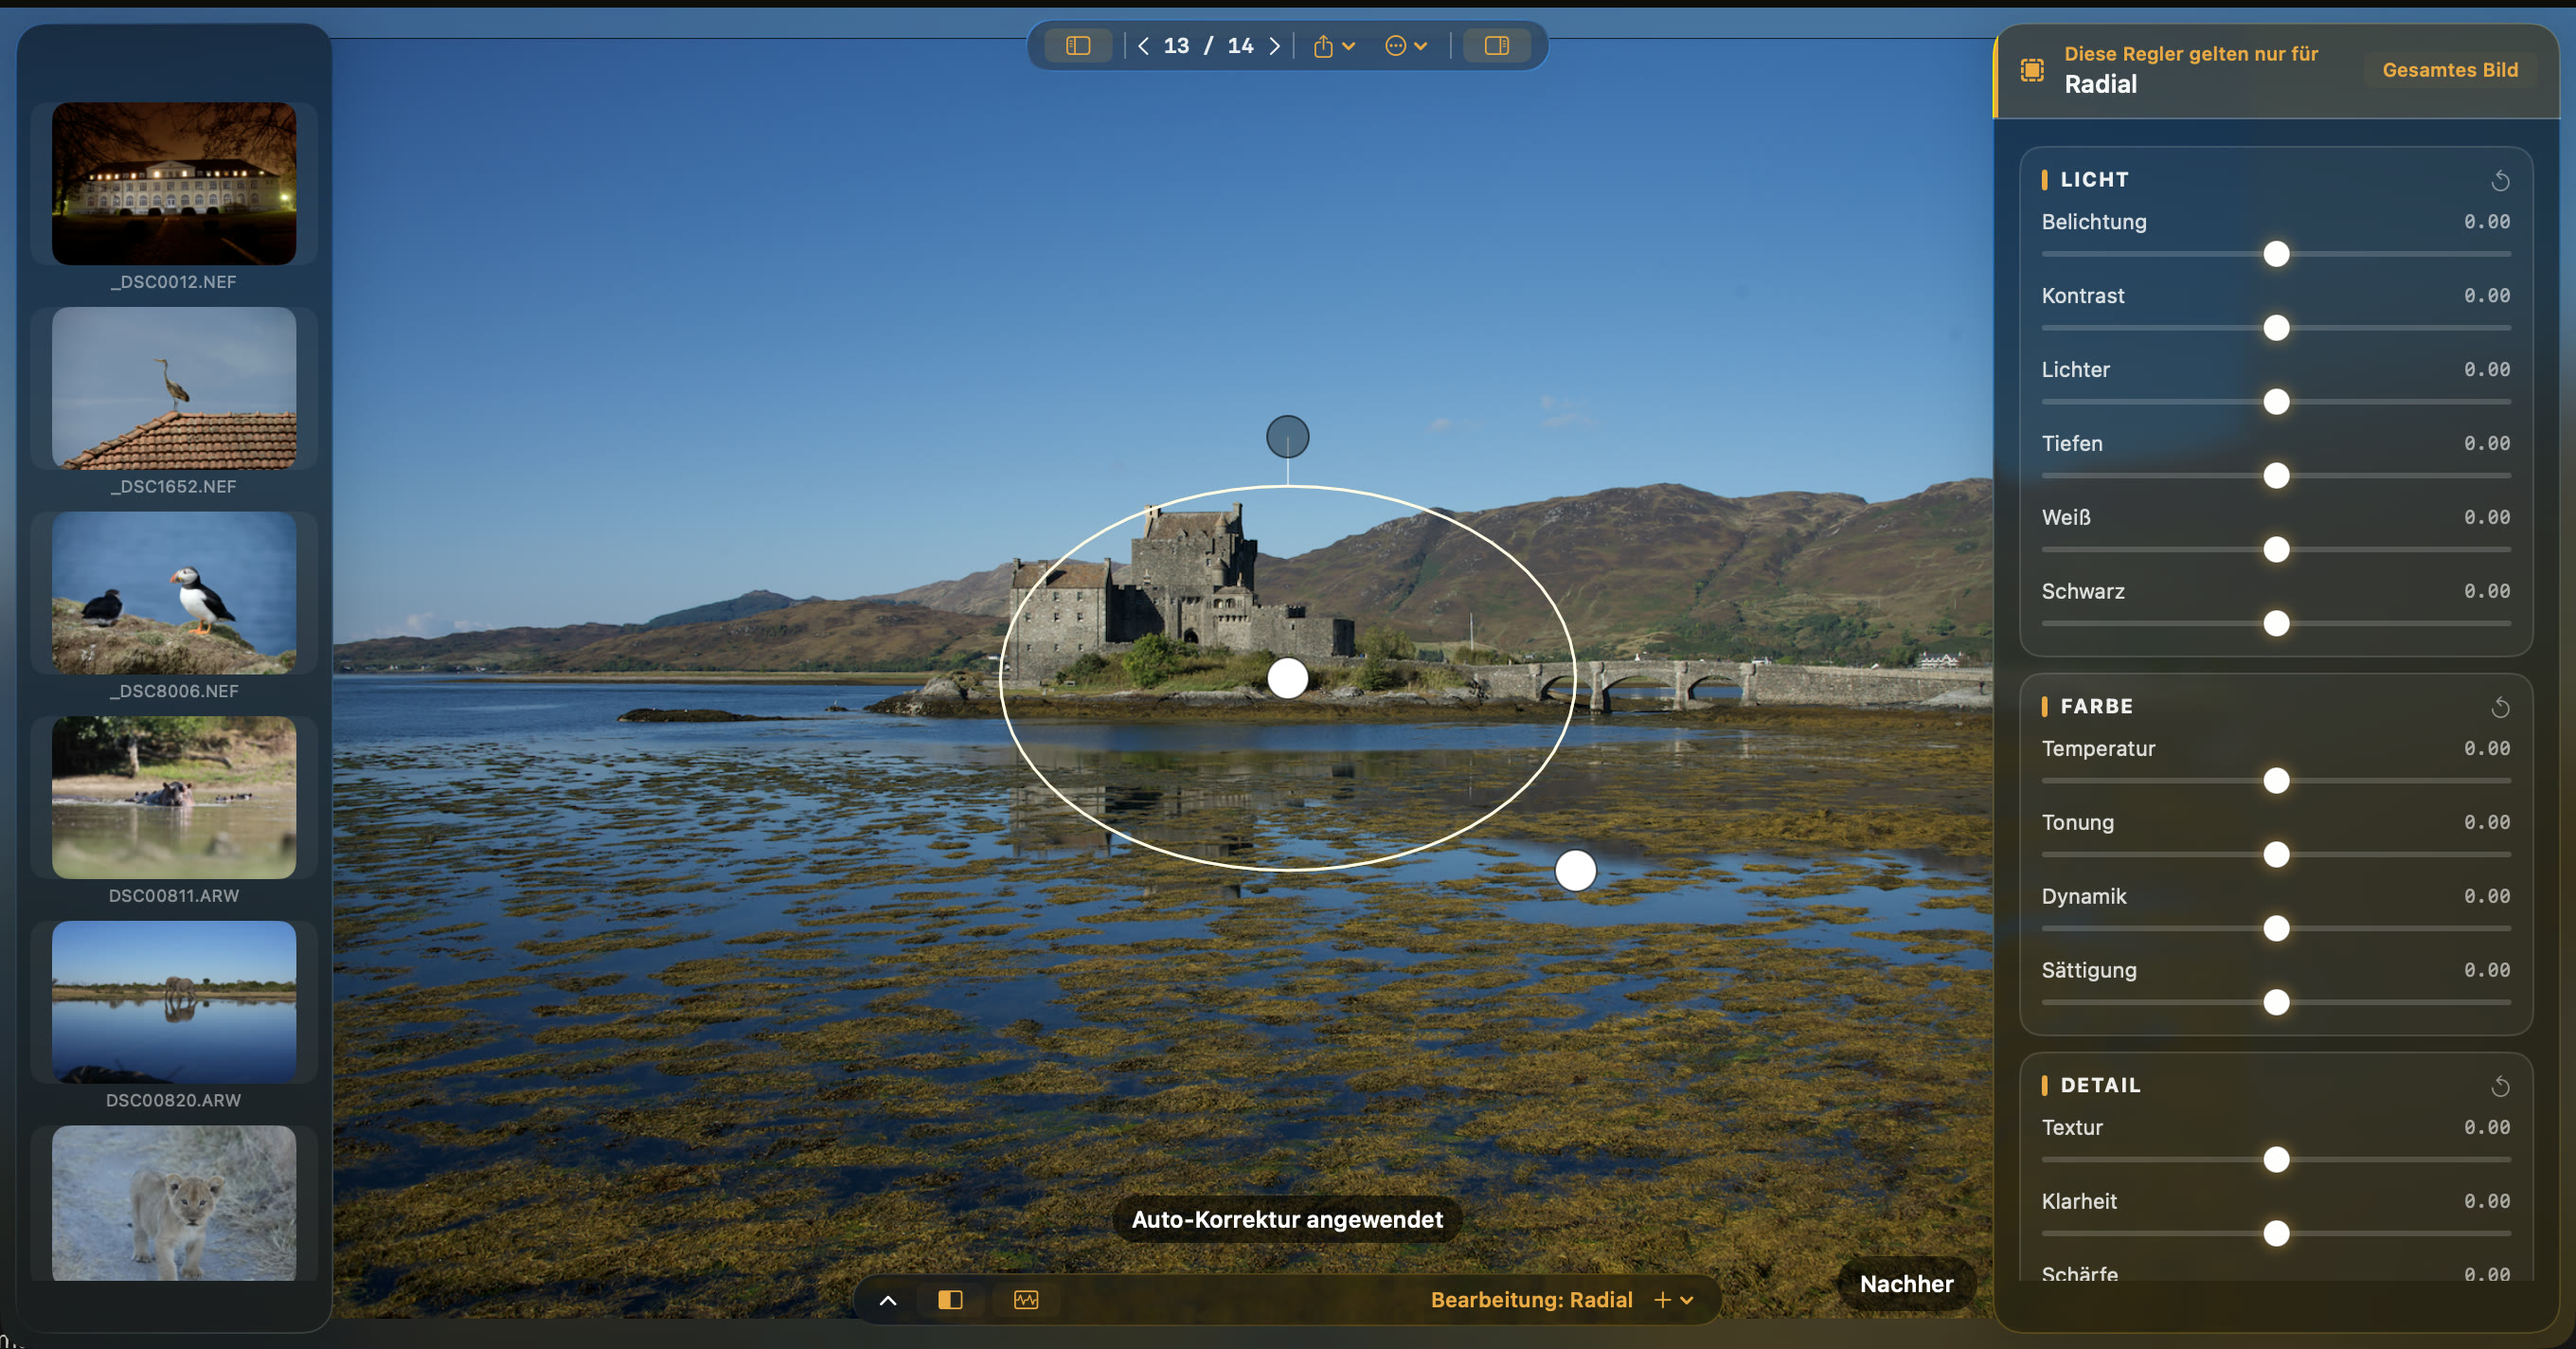
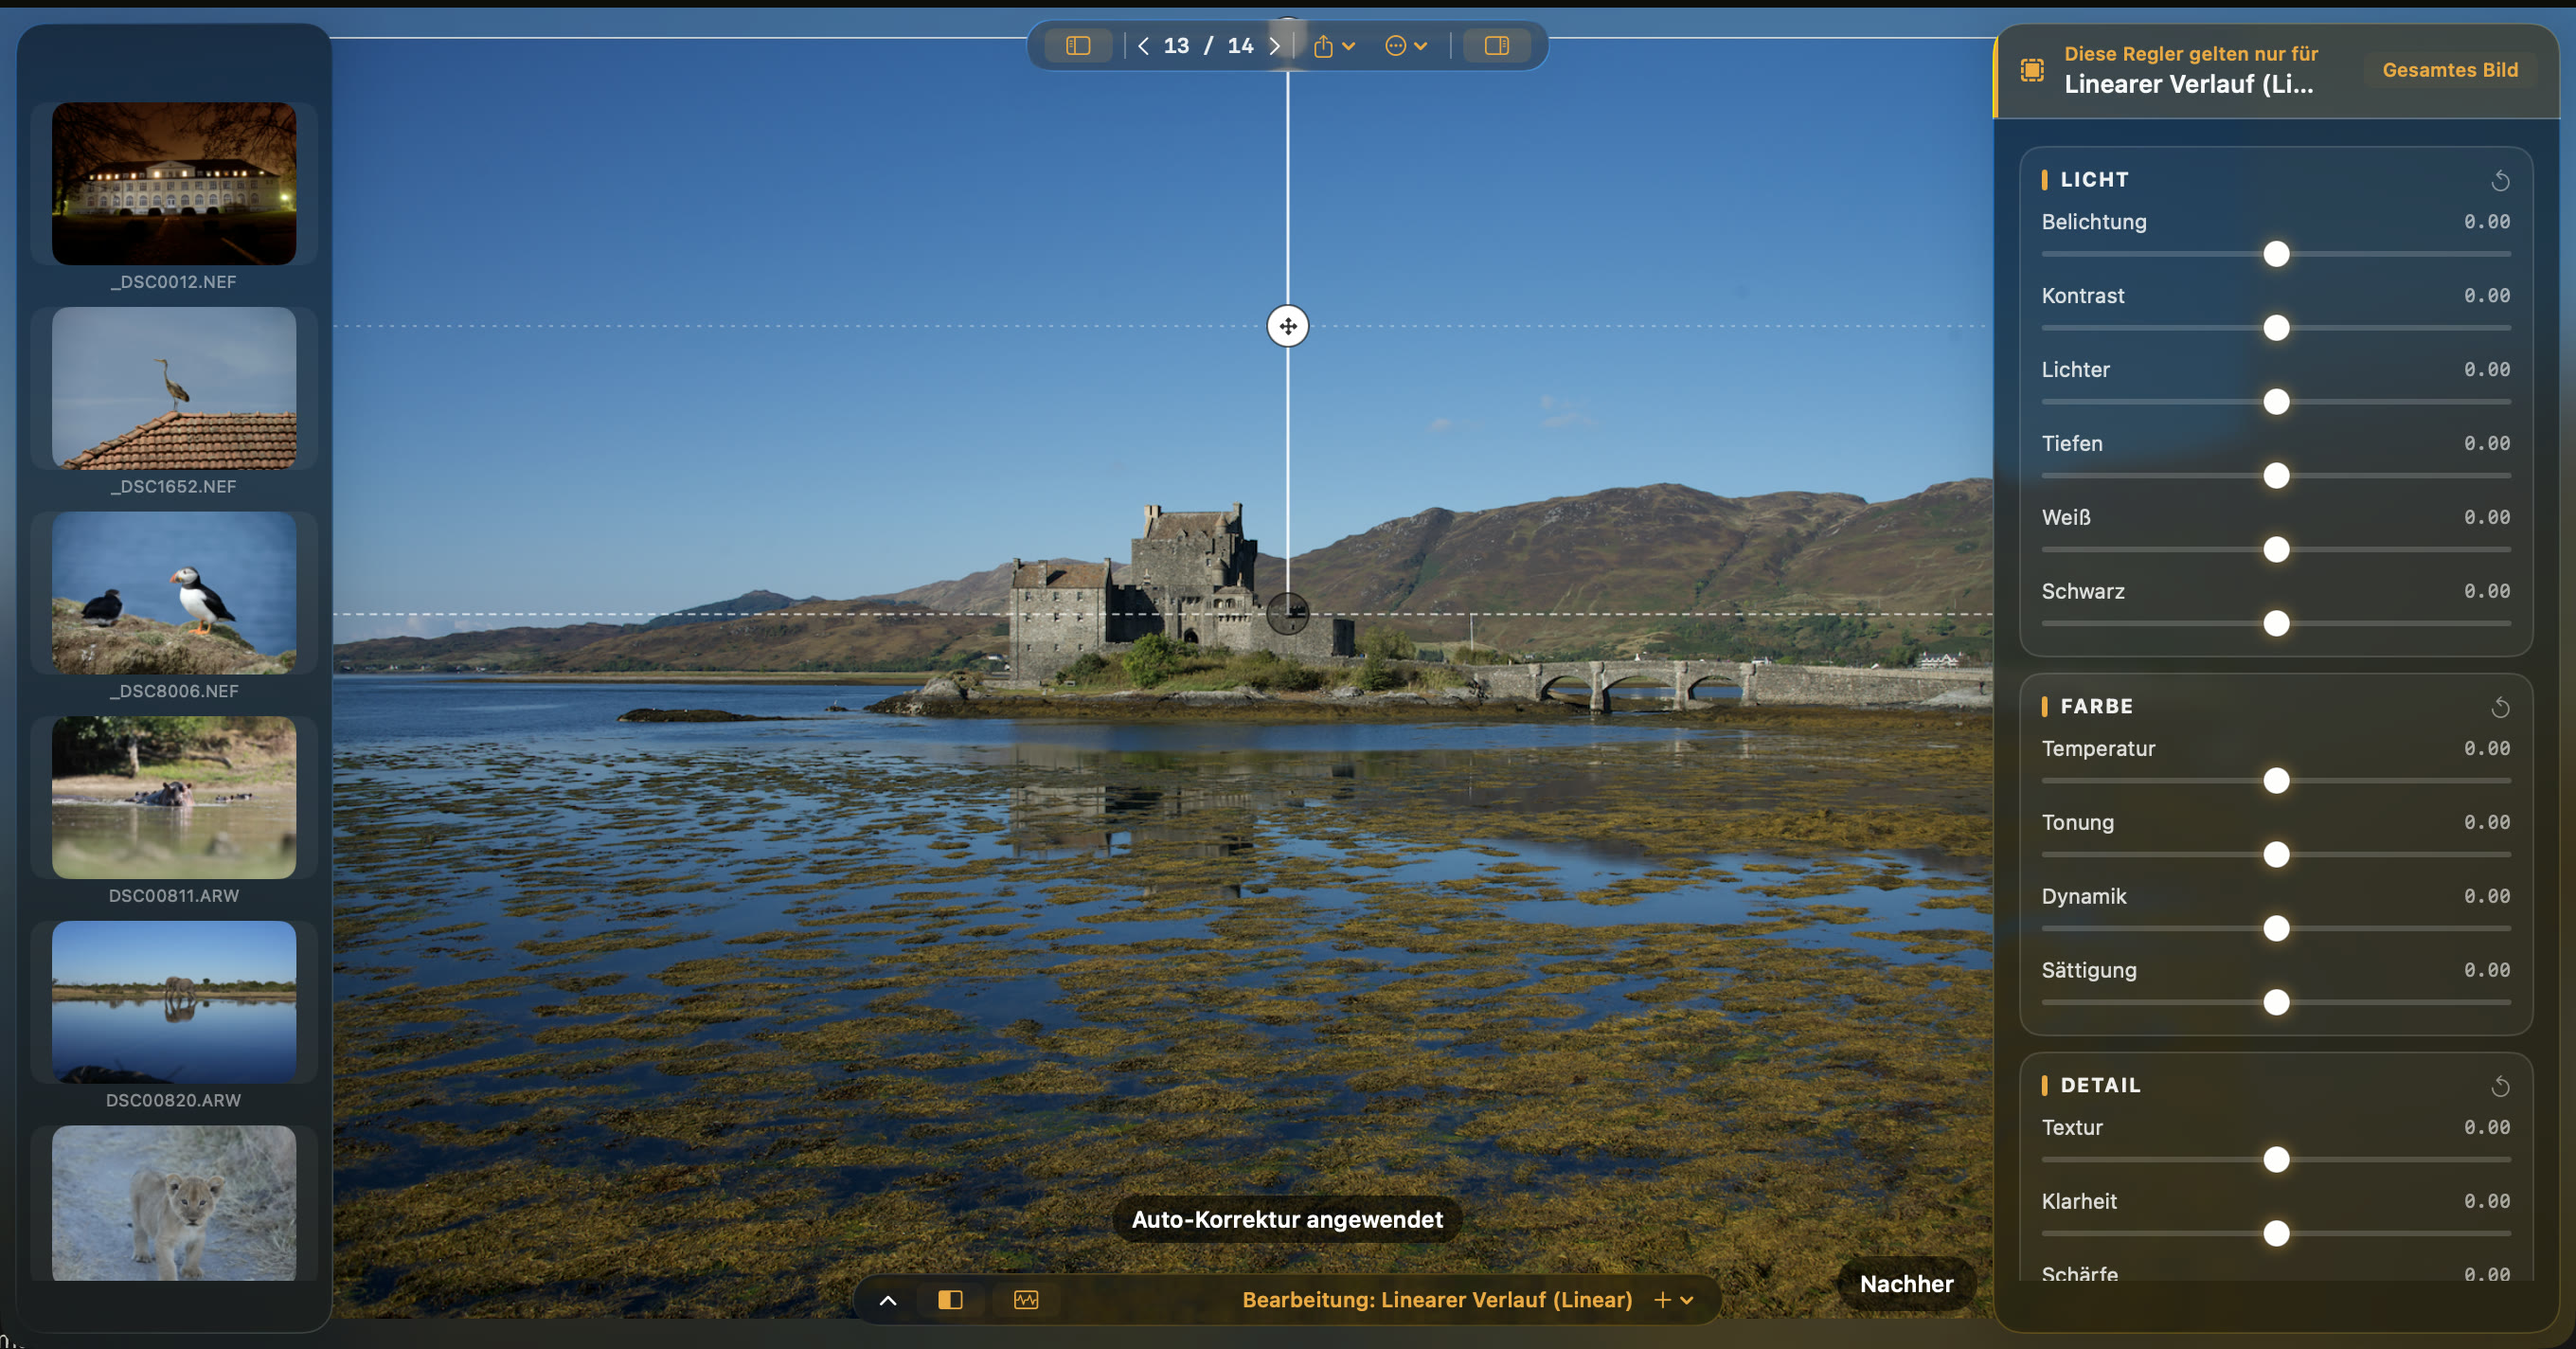
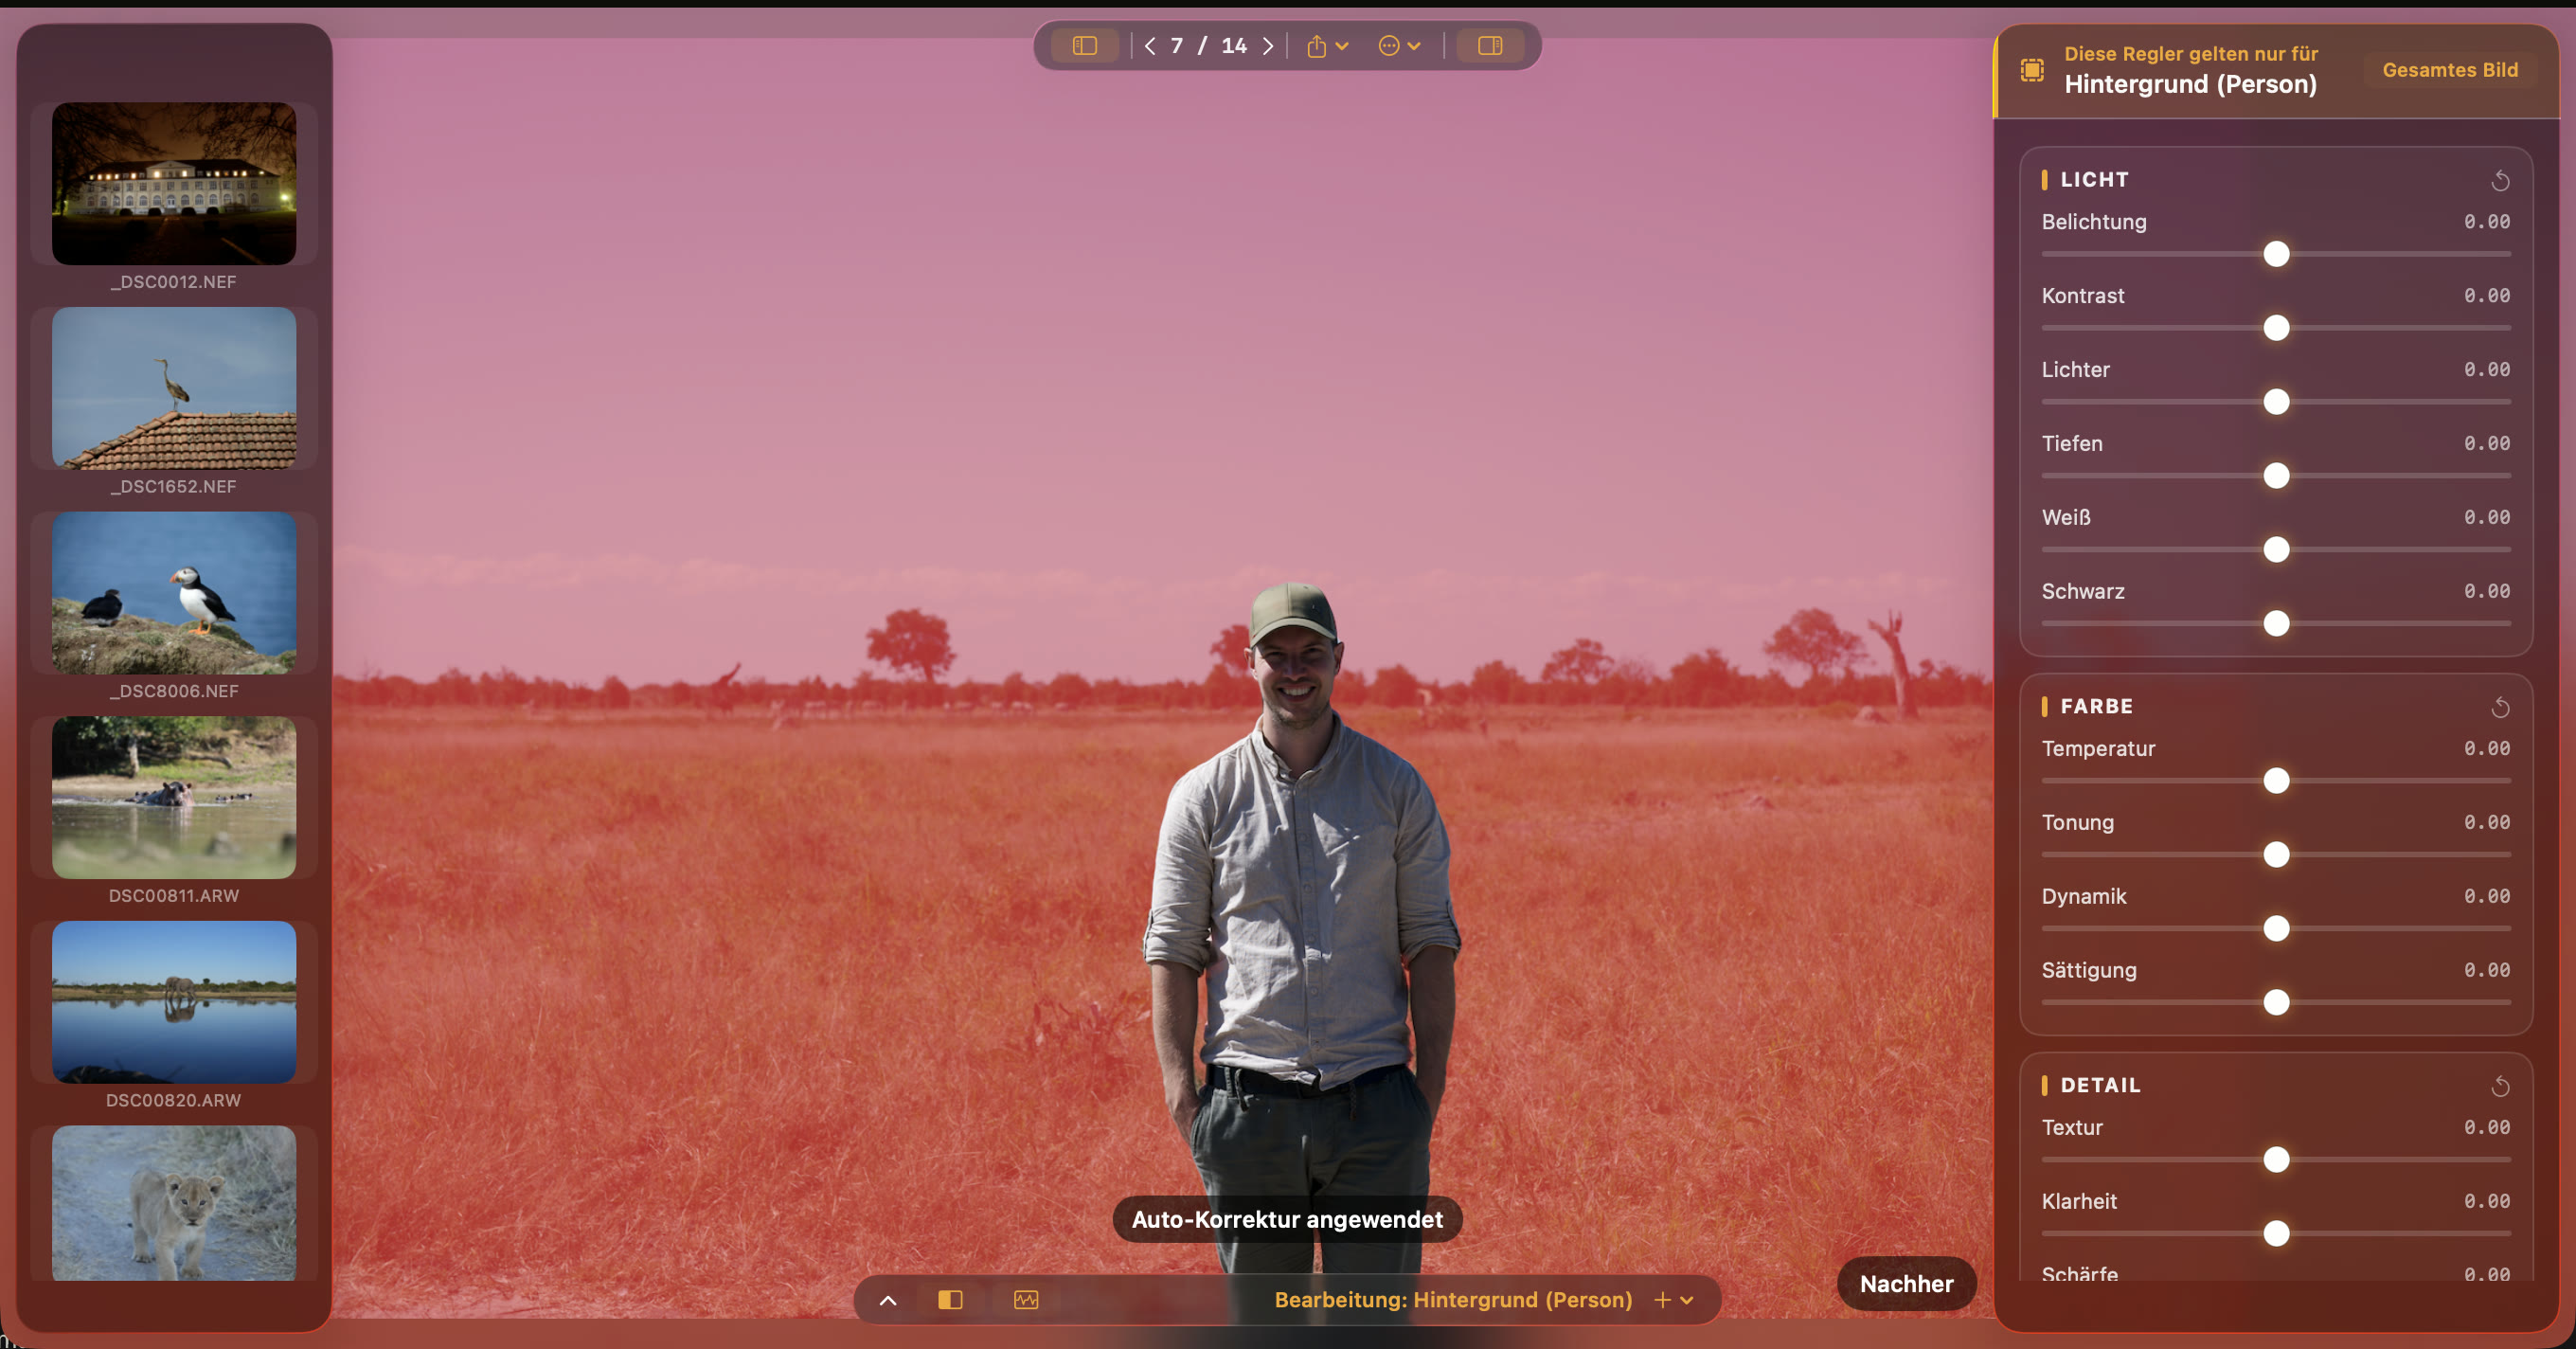
    Radial, linear, luminance, colour, subject, person, face, background.

  3. Masks · 3 / 4

    Subject found

    The controls now apply to the subject only; the panel shows range and feathering.

  4. Masks · 4 / 4

    On the subject only

    Exposure and shadows affect only the subject; the sky stays as it is.

Recording of the running app · frame sequence from the clip

Your original stays yours

Your original. Room to try something else.

Opura Photo saves your edits alongside the original, so you can come back to them later.

Input
22 RAW file extensions plus JPEG, HEIC, TIFF, and PNG
Output
JPEG, HEIC, and 16-bit TIFF in sRGB
Batches
Apply a look and export multiple photos
System
For Macs with Apple Silicon · macOS 26 or later

Find the look for your photo.

Natural, Warm or Clear: choose a starter look or a preset such as Portrait or Landscape.

Look pickerLandscape preset
Complete feature list (v0.4.0)

Open and formats

Opura Photo works on the folder you already have. The original stays untouched.

22 RAW file extensionsARW, CR3, CR2, NEF, RAF, DNG, ORF, RW2, PEF, SRW, NRW, CRW, SR2, SRF, GPR, 3FR, FFF, IIQ, RWL, ERF, MRW, MOS. .raw and .dcr are deliberately excluded.
JPEG, HEIC/HEIF, TIFF, PNGThe same view opens finished images too; RAW-stage controls stay RAW-only.
Open a folder or filesDialog, a drop on the window, a Finder double-click or the Dock. A folder starts the scan, files open exactly those.
Recent foldersThe start screen lists earlier folders; unreachable ones stay listed as unavailable.
Ratings from the cullStars and colour labels from the XMP sidecar are imported during the scan.
Hand-off from Opura Select“Develop these” arrives through a durable queue and survives a crash.
Recipe as a sidecarThe edit sits next to the image as .luce.json; a same-named RAW and JPEG never share one recipe.
The original stays read-onlyThe source file is never written; every edit is re-rendered on open.

Simple mode and looks

Find a starting look. Move into Advanced mode when you want to refine it.

Two views, one recipeSimple and Advanced show the same recipe; switching is view state only, with no second history.
Three starter looksNatural, Warm and Clear each set a small group of values; one look replaces the previous one.
Three basic slidersExposure, warmth and saturation, on the same mask-aware path as the detailed inspector.
Crop, compare and export in the same panelCrop, show the original, remove the look and export without switching views.
Seven genre presetsPortrait, Landscape, Wildlife, Street, Architecture, Night, Cinematic.
Your own presets“Save Current as Preset…” stores the edit; saved presets appear in the same menu.
Preset strengthOne slider blends between the pre-preset state and the preset; repeated drags do not compound.
Copy and paste a look⌘⇧C copies, ⌘⇧V pastes into the current photo, ⌘⌥V into all shown.

Light and colour

The controls that set the tone of a photo.

Exposure and contrastExposure in stops, contrast as a gentle curve.
Highlights, shadows, whites, blacksFour tonal ranges as their own curve points.
White balanceTemperature warm/cool and tint green/magenta.
Vibrance and saturationVibrance lifts restrained colours, saturation affects all of them.
Dehaze and vignetteCut haze or add atmosphere; darken or lighten the corners.
Colour mixer (HSL)Eight colour bands, each with hue, saturation and luminance.
Tone curveMaster plus separate red, green and blue curves.
Colour gradingThree colour wheels for shadows, midtones and highlights, with balance and blending.
Look LUT (.cube)A .cube file is loaded and blended in by amount.
Auto and Auto Levels“Auto” proposes exposure, white balance and contrast; “Auto Levels” stretches each channel.

Detail, optics, crop and retouching

What follows light and colour: grain, edges, optics, framing and spots.

Noise reductionLuminance, colour and detail recovery as three sliders.
Sharpening with radiusAmount and radius are set separately.
Clarity and textureClarity at a large radius, texture at a medium one.
Lens correctionsDistortion, chromatic aberration, vignetting and fringing, set manually. There are no automatic lens profiles.
Crop and straightenFree, 1:1, 3:2, 16:9, 2:3, 9:16; the horizon is rotated and empty corners are trimmed.
Rotate and flipLeft, right, horizontal, vertical, without changing the pixels.
Remove spotsClone copies a clean patch, heal also matches the colour to the surround.
Enlarge and deblur at exportFactor 1–4 with MetalFX; optionally a Real-ESRGAN or Restormer model you installed yourself.

Masks

Give individual parts of the photo more attention. Each mask has its own controls.

Subject, person, face, backgroundVision finds the foreground, the person and the face; background is the inverted mask.
Radial and linearAn ellipse with feather and rotation; a gradient between two edges. Both invertible.
BrushStrokes with radius and hardness.
Luminance and colour rangeA brightness window or a sampled target colour with tolerance, also as a refinement of any other mask.
Combine masksUnion, intersect and subtract join several masks into one region.
Own controls per maskTone, colour, HSL, tone curve and colour grading per mask.
Three mask presets“Enhance Eyes”, “Sharpen Object” and “Clean Background”.
Show the maskThe O key shows the overlay; the mask strip sits collapsible under the photo.

Review, export and batches

Give a series a consistent look and export the photos in the format you need.

Histogram with clippingRGB histogram with a readout for clipped shadows and highlights (H, ⇧H).
Loupe 1:1Z or the space bar; the arrow keys pan.
Before/after and splitShow the original or split the frame.
Filmstrip with ratingsThumbnails with stars and labels from the cull; “Keepers only” and “Hide rejects” as filters.
Export JPEG, HEIC, TIFFJPEG and HEIC at 8 bit, TIFF at 16 bit, all in sRGB.
Batch exportThe selected photo or all shown into the same destination, “Edited” by default.
Size, sharpening, qualityLong edge original, 2048 or 4096 px; output sharpening; quality with an optional file-size cap.
WatermarkText at six positions, with opacity, optionally from the EXIF copyright.
Sync settingsTransfer section by section across a series; crop, masks and spots off by default.

Agent and languages

The app processes your photos on your Mac. Your AI assistant can help through MCP when you allow the connection and its permissions.

Everything localDecode, edit and export run on the device; no analytics, no image upload.
Install optional models yourselfReal-ESRGAN and Restormer are never bundled or downloaded; a local .mlpackage is validated and copied in.
AI agent (MCP)Twelve tools: read the recipe, apply presets, set adjustments, add and combine masks, undo and redo. Off by default; mask writes need a separate grant.
Audit trailEvery agent action is logged and stays exportable in machine-readable form.
Customize shortcutsHelp ▸ Keyboard Shortcuts (⌘/) shows the map; your own bindings in Settings, conflicts are refused.
LanguagesGerman and English, following the system language.
One clear price

Try it first. Decide later.

The trial ends without an automatic purchase. If Opura Photo suits you, you can then choose an annual subscription.

Opura Photo · Annual
USD 59for the first 12 months

Renewal: USD 39 for each following 12 months.

  • 7 days free
  • No card for the trial
  • No automatic purchase
Start free

The 30-day money-back promise applies separately from the date of purchase.

7 days free · no card

Download Opura Photo for your Mac.

Open the app and sign in or create an account. The app will show you the next steps for activation. There is no automatic purchase afterward.

Download Opura Photo

For Macs with Apple Silicon · macOS 26 or later
System
macOS 26+ · Apple SiliconArm64-only release; Intel Macs are not supported.